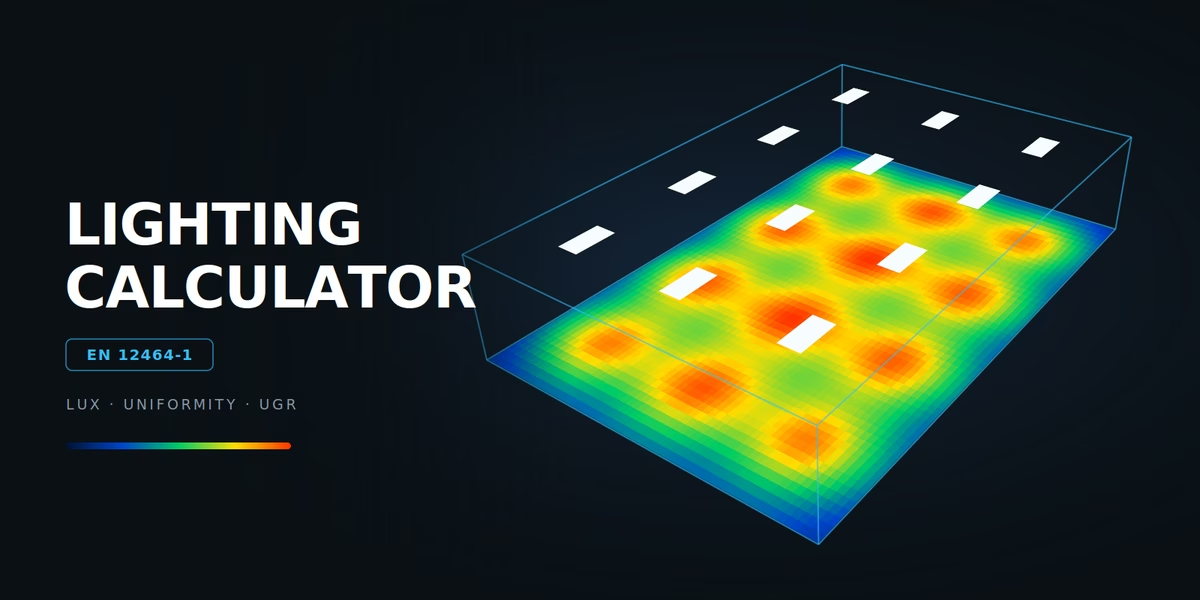
This lighting calculator works out how much light actually lands on your working plane, how evenly it spreads, and whether the installation will glare. Unlike a plain lumen calculator that divides flux by floor area, it traces the light through the room. Set the room, pick the visual task, describe one luminaire, and this lux calculator follows the method of EN 12464-1 — maintained illuminance, uniformity, glare rating and power density, all at once.
The calculator sits on this page. If you would rather keep it beside your drawings, the Indoor Lighting Calculator (EN 12464-1)↗ opens as a standalone page in a new window — handy while you work through a layout in another tab.
What the calculator works out
| Result | Meaning |
|---|---|
| Ē | Maintained average illuminance in lux on the calculation plane |
| U₀ | Uniformity, Emin divided by Ē |
| UGR | Unified Glare Rating, worst observer position |
| E min / E max | Darkest and brightest point in the evaluation area |
| W/m² | Installed power density |
| lm/W | Luminous efficacy of the luminaire you entered |
| Room index k | Proportions of the space, k = (L·W)/(h·(L+W)) |
| Utilisation η | Share of bare lumens per m² that reaches the plane |
| Ē direct / Ē indirect | Light straight from the luminaires, and light returned by the surfaces |
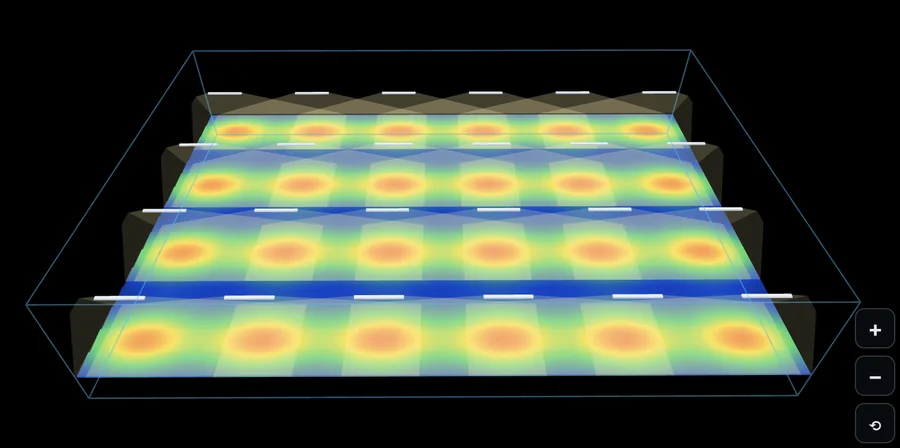
A 3D view shows the luminaire grid, the beam solids and a false-colour map of the plane, so you can see the dark corners rather than infer them from a single average.
How to use it
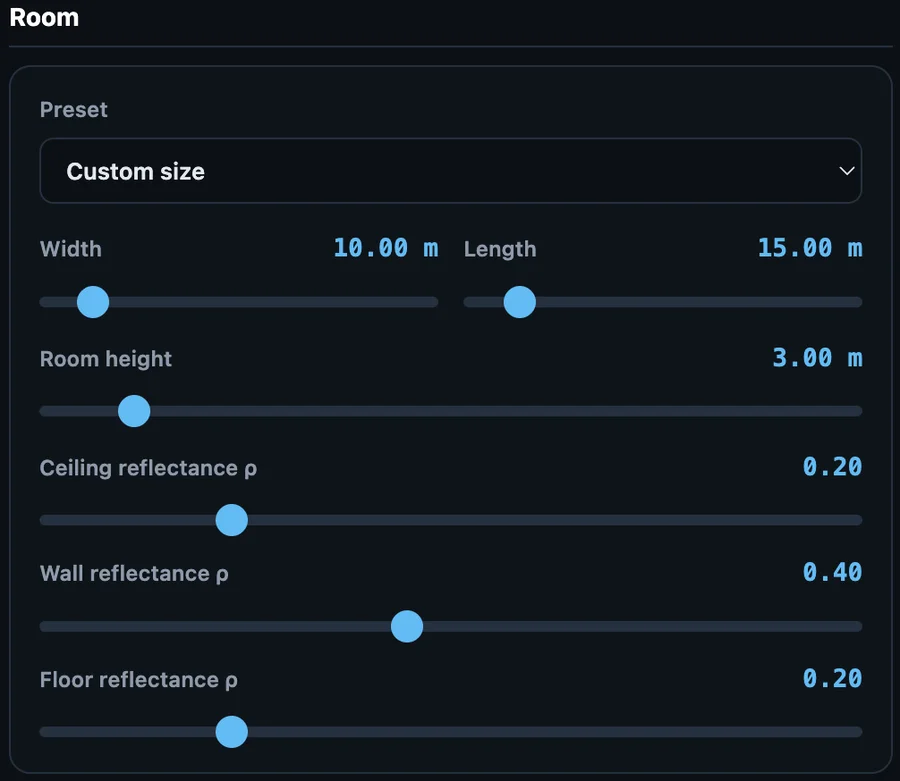
1. Describe the room. Width, length, height, and the reflectances of ceiling, walls and floor. The standard reference set is 0.70 / 0.50 / 0.20 — a white ceiling, light walls, a mid-tone floor. These matter more than people expect: interreflected light is a real share of the total, and the calculator shows it separately so you can judge.
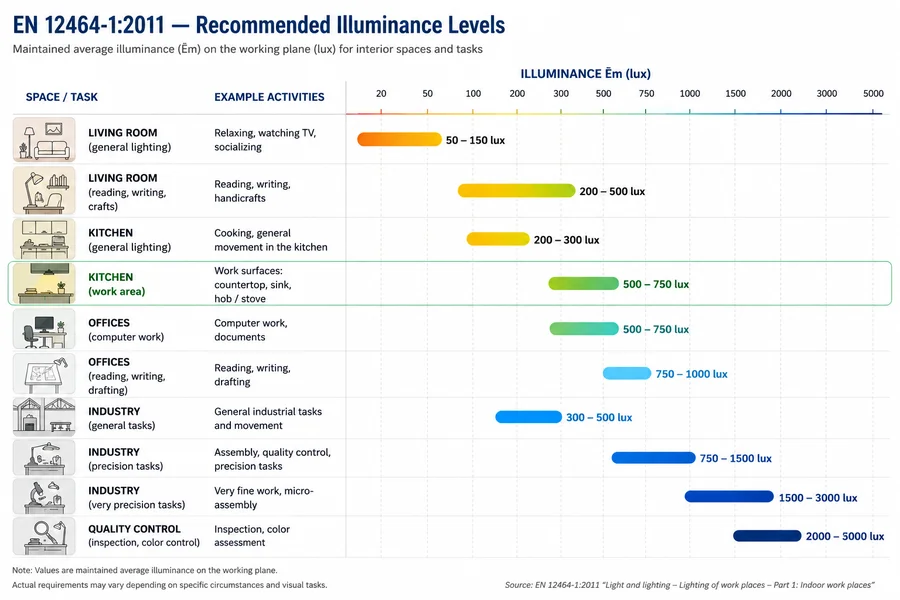
2. Choose the visual task. This sets the targets. Office work asks for 500 lx, a corridor for 100 lx, rack storage for 75 lx. The requirement line under the selector shows the full set: Ē, U₀, UGR limit and colour rendering.
3. Add context modifiers if they apply. Little daylight, older workers, small detail or low contrast, unusually long task duration — each raises the target one step on the standard's scale.
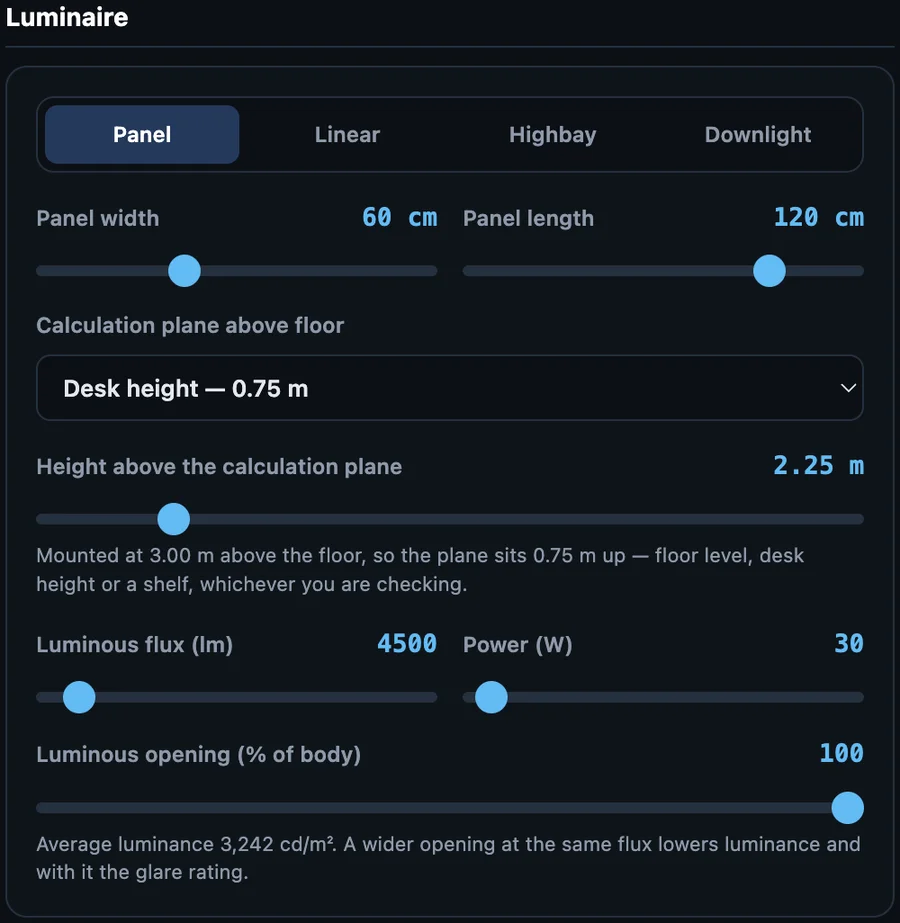
4. Describe one luminaire. Type, physical size, luminous flux in lumens, power in watts, and the share of the body that actually emits light. Then the beam angle and the shielding angle.
5. Set the layout. Columns, rows and spacing — or press Space evenly across the room and let the calculator place them.
6. Read the verdict. It compares every measured value against the target and says which one falls short.
Everything recalculates as you drag. The link in the address bar carries the whole configuration, so you can send a colleague the exact case you are looking at.
Target values in EN 12464-1
A short selection of the values the standard sets for common spaces. This is a compiled extract for orientation — the standard itself is the authority, and you should check it before relying on a number in a design.
| Space or task | Ē, lx | U₀ | UGR ≤ | Ra ≥ |
|---|---|---|---|---|
| Office — writing, reading, data processing | 500 | 0.60 | 19 | 80 |
| Meeting room | 500 | 0.60 | 19 | 80 |
| Classroom | 300 | 0.60 | 19 | 80 |
| Retail sales area | 300 | 0.60 | 22 | 80 |
| Assembly — medium | 500 | 0.60 | 22 | 80 |
| Quality control and inspection | 750 | 0.70 | 19 | 90 |
| Corridor | 100 | 0.40 | 28 | 40 |
| Open goods storage | 200 | 0.40 | 25 | 60 |
| Rack storage — rack face | 75 | 0.40 | 25 | 60 |
| Parking garage | 75 | 0.40 | 25 | 40 |
Two values moved in the 2021 edition: storerooms went up from 100 to 200 lx, and rack storage came down from 200 to 75 lx. New entries were added for open goods storage, unmanned automated zones and loading bays.
The illuminance ladder
Targets do not take arbitrary values. They sit on a fixed scale:
20 · 30 · 50 · 75 · 100 · 150 · 200 · 300 · 500 · 750 · 1000 · 1500 · 2000 · 3000 · 5000 lx
When a factor such as poor daylight or reduced visual acuity applies, the target moves one rung up. When several apply, two rungs. The calculator does this for you and shows both the base value and the raised one.
How the calculation works
Direct light. Each luminaire is treated as an area source, not a point. A panel is subdivided into a grid of emitters, a linear luminaire into segments along its length, and the count adapts to the mounting height so that every sub-emitter stays effectively point-like from the nearest calculation point. Each sub-emitter follows a cosine-power distribution derived from the beam angle you entered: an FWHM of 110° means the intensity has fallen to half at 55° from vertical.
Interreflected light. Painted walls scatter light rather than reflecting it like a mirror, so the return path is solved by flux transfer. The flux that misses the plane lands on the walls, part of it comes back, and the process converges:
Φ₁ = Φ_plane·ρ_floor + Φ_walls·ρ_walls
E_indirect = Φ₁ / (A_total · (1 − ρ̄))
The result is added uniformly, which is the standard approximation for a diffuse room. Energy balances exactly: the flux absorbed by the surfaces equals the flux the luminaires emit.
Glare. UGR follows CIE 117:
UGR = 8 · log₁₀( 0.25/L_b · Σ L²ω/p² )
The luminance L comes from the intensity divided by the projected luminous area, the solid angle ω from that area and the distance, and the position index p from Einhorn's closed form. Observers are placed at 1.2 m eye height across a grid, looking along both room axes in both directions. The worst case is reported.
If you want to calculate lighting for a growbox, we have a separate calculator for 3D simulation of lighting in a growbox and building a PAR maps↗.
What this calculator is, and what it is not
It is an engineering estimate for planning and comparison. It is not a photometric proof, and it does not replace DIALux or Relux, which work from measured IES or EULUMDAT photometry — hundreds of intensity values per luminaire rather than one formula.
Two known offsets, both measured rather than guessed:
Utilisation reads high. For a room index around 2.7 with 0.70 / 0.50 / 0.20 reflectances, this calculator gives η ≈ 0.95, while manufacturer utilisation tables give 0.80–0.85 for the same room. The model conserves energy exactly, so the gap comes from the idealised cosine-power distribution and the sphere approximation for interreflection. η is shown as its own field precisely so you can compare it against your manufacturer's table and apply a correction.
Glare reads conservative. A cosine-power source keeps more light in the 50–70° band than a real shielded optic does, so UGR comes out roughly two to three points above a published UGR table. The error is in the safe direction — the calculator will warn about glare slightly sooner than reality demands.
For anything that has to be signed off, run the final check in software driven by the actual photometric file of the luminaire you intend to buy.
Four results that look wrong but are not
A linear luminaire makes a round pool of light. Physical length barely stretches the pool. At 2 m mounting height the 50 % contour already has a radius of about 1.3 m, so the pool is 2.6 m across while the luminaire is 1.2 m long. Measured aspect ratios: a 1.5 m body gives 1.10, a 2.4 m body gives 1.24. Real elongation comes from the optic, not the housing — switch on the asymmetric distribution and give the two axes different angles. At 70° × 130° the same 1.5 m luminaire produces an aspect ratio of 1.49.
The shielding angle is always wider than the beam angle. Both are stated as full cone angles. A beam of 110° means ±55° from vertical; a cut-off of 130° means the optic stops emitting beyond 65°. The cut-off has to sit outside the beam, otherwise it would chop away the very beam it describes, so the calculator holds it at least 10° wider.
The luminance figure looks enormous. 15 000 lm from a 100 × 8 cm aperture really does give about 66 000 cd/m² as a Lambertian equivalent, and more for a directional optic. That is arithmetic, not an error — and it is why a bare high-output batten belongs in a warehouse, where the glare limit is 25, rather than an office, where it is 19. If your luminaire has a wider body or a diffuser, enter the real width; doubling it halves the luminance.
Wider spacing can improve uniformity. The obvious rule, spacing equals room length divided by luminaire count, leaves half a pitch to the wall and starves the perimeter. Placing the outer row about a third of a pitch from the wall works better. In a 10 × 15 m room with 24 luminaires, the naive rule gives U₀ = 0.58 and the correct one gives 0.74 — same luminaires, same power. The Space evenly button uses the second rule.
A worked example
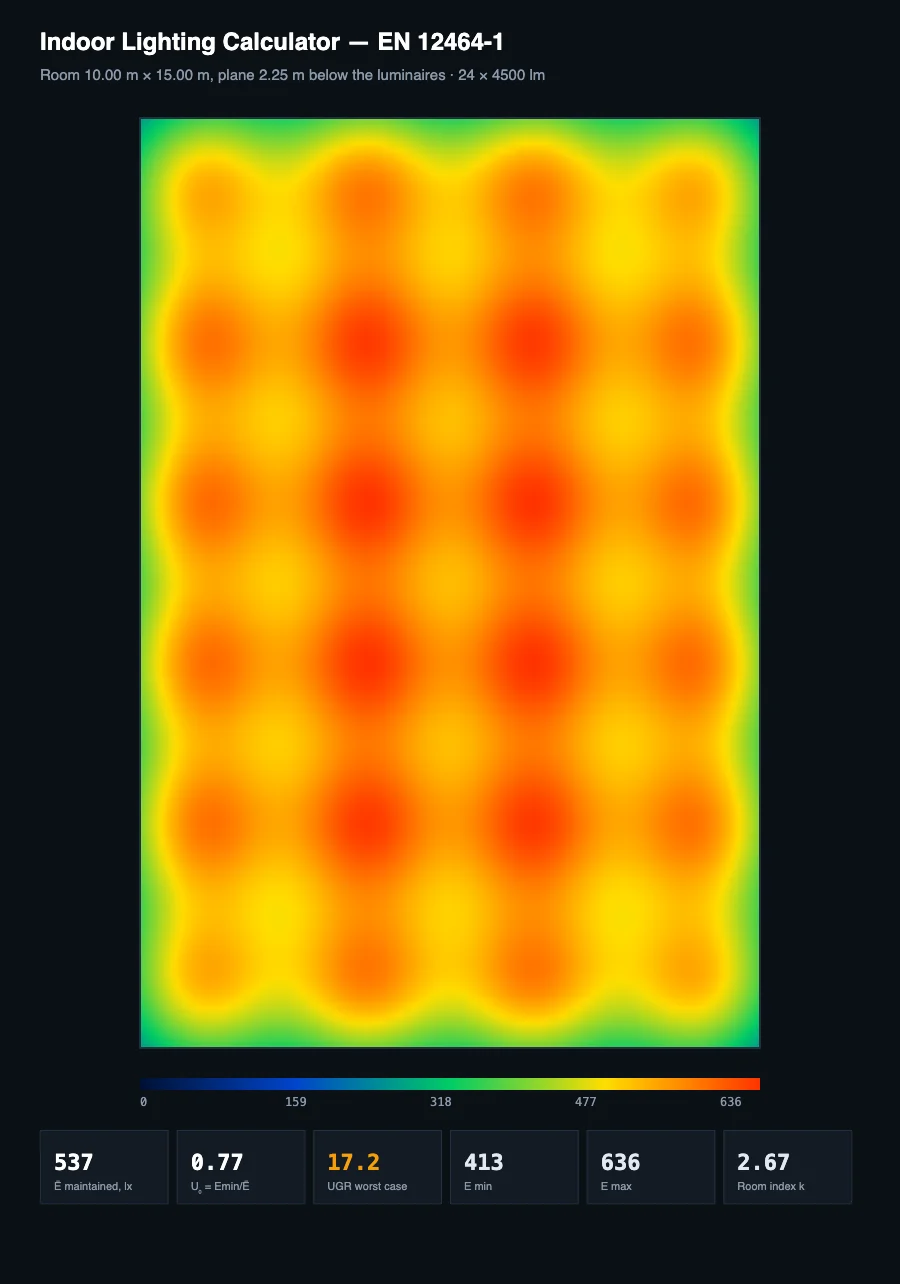
As an office lighting calculator, the most common case looks like this. A 10 × 15 m office, 3 m high, working plane at 0.75 m. Twenty-four 1200 × 600 mm panels of 4000 lm each, 2.7 × 2.6 m spacing, maintenance factor 0.80.
| Result | Value | Target |
|---|---|---|
| Ē | 502 lx | 500 |
| U₀ | 0.72 | 0.60 |
| UGR | 17.7 | 19 |
| W/m² | 4.8 | — |
| Room index k | 2.67 | — |
All three requirements met, with the glare margin coming from the panel size: 4000 lm spread over 0.72 m² of luminous surface gives a moderate luminance. The same flux in a 600 × 600 panel would halve the area, double the luminance and push UGR past the limit.
A configured example is linked below:
An example of a lighting calculation for an office with a 10x15m ceiling height of 3m
Saved result in png format:
At 4.8 W/m² over 150 m² the installation draws about 720 W, and that is where the lighting design ends and the electrical design begins. Split across two or three circuits, work out the conductor with the cable size and voltage drop calculator↗ — with runs of 30–40 m through a large office, voltage drop usually decides the cross-section long before the current rating does. Then pick the protection: choosing a circuit breaker↗ covers why LED drivers with high inrush current often want curve C rather than B.
Frequently asked
How many lumens per square meter do I need? Start from the target illuminance and divide by the losses. For 500 lx with a utilisation of 0.8 and a maintenance factor of 0.8, you need roughly 500 / (0.8 × 0.8) ≈ 780 lm/m² of installed flux. For a 150 m² office that is about 117 000 lm. The calculator does this properly, taking your actual geometry into account rather than a flat coefficient.
Can I use it as a lux to watt calculator? Yes, indirectly. Enter the flux and power of your luminaire and the calculator reports W/m² and lm/W alongside the illuminance, so you can see the energy cost of reaching a given lux level.
Why does the average change when I move the calculation plane? Because the plane is what you are measuring on. Raising it towards the luminaires shortens the distance and raises the illuminance. Set it to floor level for a warehouse, 0.75 m for desks, 0.85 m for a workbench.
What maintenance factor should I use? The calculator offers four: 0.90 for very clean spaces, 0.80 for a clean office, 0.70 for normal industry, 0.60 for dusty or dirty conditions. It is a real allowance for lamp depreciation and soiling, not a safety margin to be skipped.
Can I use it as a warehouse lighting calculator? Yes. Choose Highbay as the luminaire type, set the calculation plane to floor level, and pick a storage task. Room height goes up to 12 m, which covers most high-bay buildings.
Is this a lighting design calculator or just a rough check? It is a design aid: the outputs follow the method of EN 12464-1 and are accurate enough to compare layouts and size an installation. It is not a substitute for a photometric proof — see the limits above.
Does it work on a phone? Yes. The 3D view rotates by dragging and zooms by pinching, and the layout reflows to a single column.
What is circadian lighting, and how does light affect alertness and melatonin? Unlike standard lux, which indicates how bright light is for our vision, melanopic EDI is measured in a special "circadian" lux equivalent. EDI shows how strongly light activates the photosensitive cells in the eye (ipRGCs) that regulate the biological clock, the production of the sleep hormone melatonin, daytime alertness, and mood. The spectrum of natural daylight is used as the reference point. Use the calculator to calculate melanopic EDI↗.
Related tools and reading
- SunLike LED Spectrum Mixer: Perfect Custom Light with Duv Control↗ — a spectrum simulator that helps visualize the blending of SunLike LEDs (from 2700K to 6500K) and calculates the Planckian locus deviation (tint shift).
- 3D Grow Tent Lighting Simulation and PAR Mapping↗ — an online calculator for evaluating PPFD levels and modeling spatial light distribution for plants.
- Wire Size Calculator by Power and Current (mm² to AWG/SWG Converter)↗ — a tool for accurately sizing power supply lines for LED fixtures, accounting for voltage drop.
- How to Choose a Circuit Breaker: Rating and B, C, or D Curve↗ — a guide to calculating load power and selecting reliable protection for your electrical circuits.
- Circadian Lighting and Melanopic EDI Calculator↗ — a comprehensive article on how light affects melatonin, along with a tool to evaluate the biological efficacy of lighting.