Found a piece of an aluminum heatsink profile at a flea market for a good price? It’s a nice finned heatsink, but there is no documentation for it — no SKU, no catalog, and no main parameter like the "cross-sectional perimeter". Without the perimeter, it’s unclear what total surface area it has and whether it will handle your cooling needs. Should you calculate it manually, measuring each fin, multiplying, adding, or just guessing by eye? Now, all you have to do is enter a few dimensions into the calculator on this page — and it will compute both the surface area and the real thermal output in watts! And thanks to everyone who leaves star ratings under my widgets!
This calculator is also handy for engineers designing cooling solutions for a specific power load. When you need to quickly estimate which heatsink to use for a build with a certain wattage, it’s convenient not to dive into a heavy thermal software package, but instantly see the order of magnitude: how much heat the profile will dissipate into the air at a given temperature rise. It’s not a replacement for full-fledged CFD analysis, but for selecting a profile and designing LED lamps — it’s just the thing.
And the third scenario, the simplest one: you have a profile from a manufacturer, and their catalog honestly states the cross-sectional perimeter — for example, 399.4 mm or 1505.2 mm. The perimeter is a property of the profile itself; it doesn’t depend on the length. But the area does: cut a meter, you get one area; cut half a meter, it’s half as much. The calculator takes the catalog perimeter (entered manually), multiplies it by the length of your piece, and instantly gives you the area and thermal output of your specific heatsink cut. Essentially, it’s a "catalog perimeter → area and watts for a required length" converter.
We specialize in creating useful calculators and tools in the field of LED lighting for plants, industry, and domestic use. Therefore, for DIY project enthusiasts and professional growers, we have created a simulator: light in a grow box with a simple interface↗. The simulator allows for a fairly accurate assessment of the uniformity and level of illumination in a grow tent, and includes an option to generate a PAR map.
What Exactly the Calculator Computes
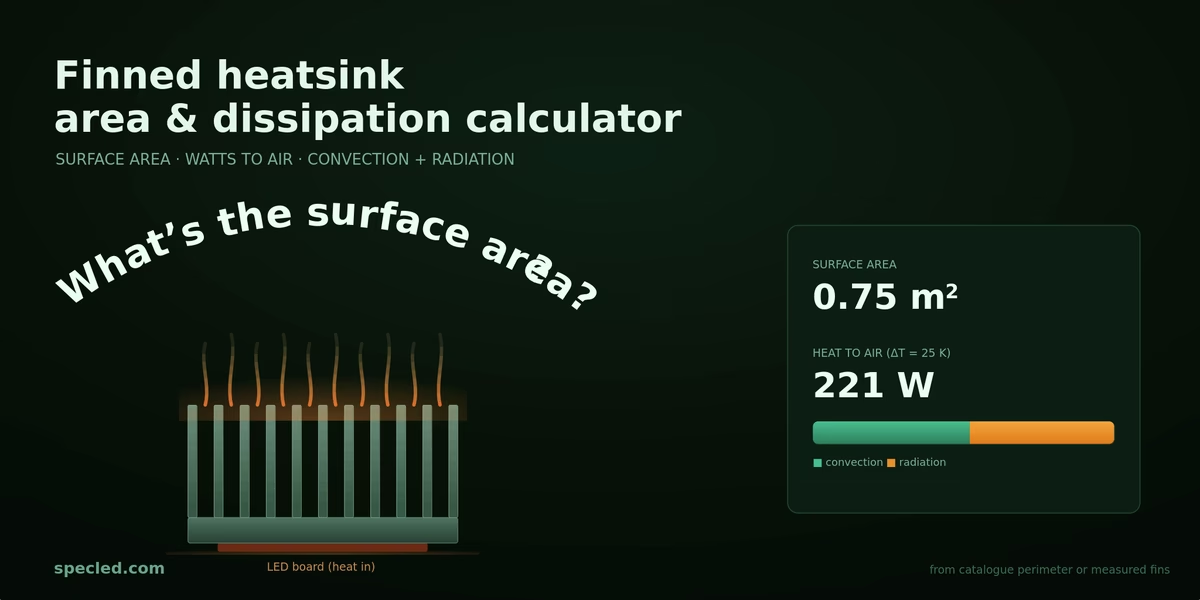
The calculator operates in two modes, and in both it provides three main things: the surface area from which heat dissipates; the individual contributions of convection (air heating) and radiation; and the total thermal output in watts at a specified temperature rise. Additionally, it shows the area and thermal output for your chosen length — this is convenient when you already have a piece of heatsink profile and need to figure out how much power it can dissipate.
Thermal output is calculated using a legitimate physical model, not some "magic internet coefficient". Convection is determined as the product of the heat transfer coefficient, the area, and the temperature difference, while radiation is calculated using the Stefan-Boltzmann law taking into account the surface emissivity. That’s why the calculator offers a choice of finishes (bare aluminum, silver anodized, black anodized) and a ΔT (temperature rise) slider: the result changes exactly as it would for a real heatsink.
The "By Profile Perimeter" Mode
This is the precise mode for when the perimeter is known. Usually, the "profile perimeter" parameter is listed on the website by the seller or manufacturer of the heatsink profile. You enter the cross-sectional perimeter in millimeters and the length of your heatsink cut — the calculator multiplies them and gets the total unfolded surface area. Why multiply? The perimeter is the length of the cross-section contour including all fins, as if you traced the end of the heatsink with a pencil and then straightened that line. By multiplying it by the length of the profile, you get the area of the entire side surface. There is no simpler way to calculate the area of a finned profile, which is exactly why the perimeter is always specified in aluminum catalogs. As a bonus, you still have the two ends of the heatsink, which can be considered an additional "margin of safety".
The "By Dimensions and Fins" Mode
This is the mode for a profile without a spec sheet. Here you don't know the perimeter, but you can grab a ruler and measure five things: the base width, the number of fins, the fin height, fin thickness, and base thickness. From these dimensions, the calculator reconstructs the area itself — calculating the fin surface and base surface separately — and simultaneously draws a schematic of the heatsink's cross-section right below the input fields. The schematic redraws on the fly: enter eight fins — you see eight, enter forty — you see forty. This isn't just decoration, it's a verification: if the drawn profile doesn't look like yours, it means you made a mistake with the numbers somewhere or entered something strange, like a width of 62mm with 100 fins. The outermost fins on the schematic always stand flush with the edges of the base — just like in a real extruded profile.
Why Is the "Bottom of Base" Checkbox Needed?
This is the most non-obvious, but crucial toggle. A finned heatsink has a smooth bottom base face — the one it presses against the heat source. In a lighting fixture, the LED board or high-power heat sources (MOSFETs) are attached to it via thermal paste, and this face ends up completely covered: air doesn't reach it, and it has nowhere to radiate into space. This means it doesn't participate in heat dissipation, and its area must be subtracted from the calculation. Or it participates, but not effectively, perhaps being inside an enclosure, and so on.
This is exactly what you can adjust. When the checkbox is ticked (by default), the calculator considers the bottom of the base to be mounted and doesn't include its area — this is the realistic scenario of an assembled LED fixture. If you uncheck the box, the area of the bottom face returns to the calculation — you should only do this if the heatsink is truly suspended in the air and its bottom is open on all sides. The difference in watts between the two states actually shows you how much heat dissipation is "eaten up" by mounting it to a board.
Orientation, Airflow, and Air Temperature
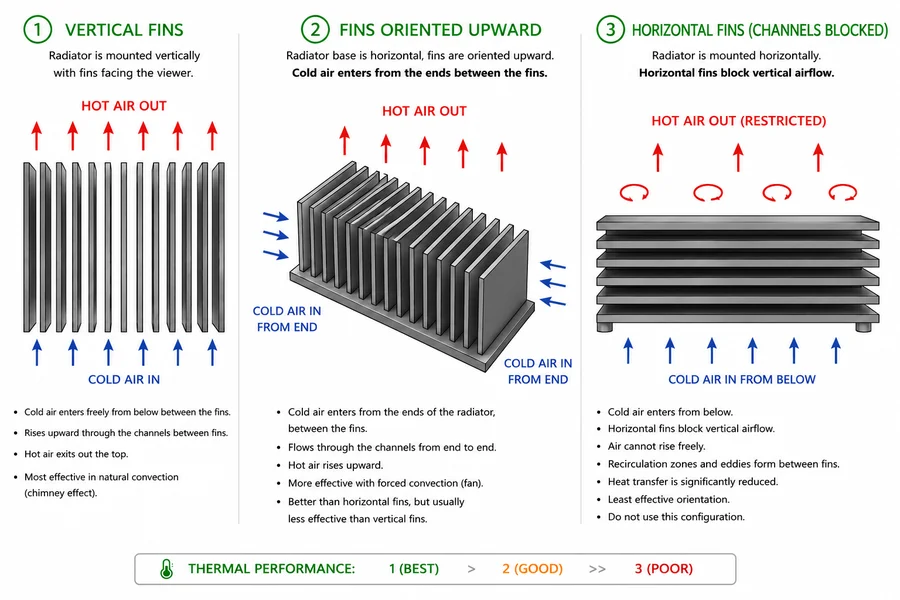
Surface area isn't the whole story of heat dissipation. The exact same piece of metal dissipates heat differently depending on how it's positioned and what surrounds it, so the calculator has three toggles that affect the result the most.
The first is fin orientation, vertical or horizontal. Vertical installation means the position where the heatsink stands on its end: its long axis points vertically, and the channels between the fins run from bottom to top. In this position, the heated air rises freely along the channels, like in a chimney — and natural convection works at its maximum. Lay that same heatsink horizontally, with the fins facing sideways, and the picture worsens: air from the lower channels has to push its way up through the upper ones, the flow is sluggish, and thermal output drops by about ten to fifteen percent. Therefore, if cooling is passive and you have a choice of how to mount the heatsink — vertical, on its end, is almost always better.
The second toggle is airflow. With active fan cooling, air is forced through, convection increases manifold, and orientation in this mode changes almost nothing — which is why the calculator ignores orientation when a fan is factored in for the averaged calculation. Understandably, fans can be completely different and have varying performance levels.
The third parameter is the ambient air temperature, which can be set from 0 to 50 °C. It mainly affects radiation: with the same temperature rise but hotter ambient air, the entire system operates at higher absolute temperatures, and the radiated share of heat slightly increases. The practical takeaway is simple — input the real temperature of your room or grow tent, rather than abstract room conditions, and the estimate will be closer to your specific case.
Smooth Fins vs. Wavy Fins
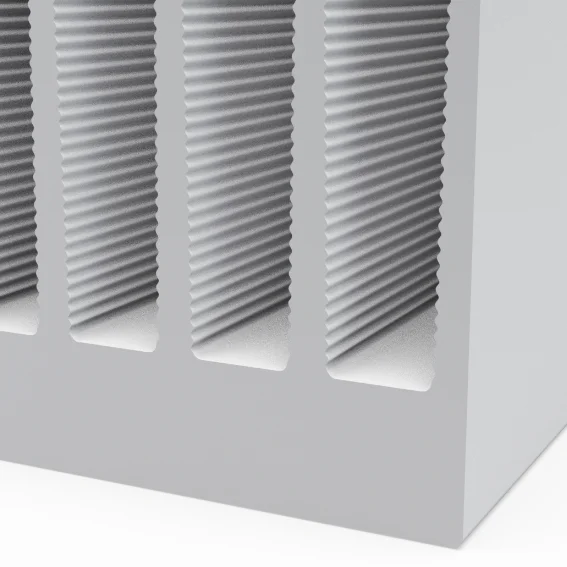
A question with a non-obvious answer! Sometimes you come across profiles with wavy, corrugated fins instead of smooth ones. It's logical to assume that the wave adds surface area, and therefore heat dissipation. It does add it — but noticeably less than it seems to the eye. Geometrically, the area of a wavy fin is ten to fifteen percent larger than a smooth one, depending on the wave's amplitude. But the actual thermal gain turns out to be much more modest — usually a single-digit percentage, around three to five percent.
The reason is that all this extra area hides in the troughs of the wave. There, in the tight grooves, the air stagnates and refreshes worse than on the open flat of the fin, so convection from these areas is sluggish. A similar story happens with radiation: the walls of adjacent folds "shine" onto each other, and a portion of the heat bounces back instead of escaping into space. So wavy fins give a small boost, but you shouldn't count on it as a major resource. The calculator computes based on a smooth unfolded surface, and if you have a wave — you can mentally add those few percent, no more. In reality, it's an extra "margin of safety" that shouldn't be factored into the main calculation.
What to Keep in Mind Regarding Accuracy
The calculator provides a solid engineering estimate, not a to-the-watt guarantee — and this is fair for any natural convection calculation, which even in serious software packages is computed with a spread of tens of percent. It already accounts for orientation, airflow, and air temperature, but there are things a browser can't simulate: the proximity of grow tent walls, dust on the fins, or the exact airflow pattern between them. Also, with densely finned profiles, neighboring fins partially radiate onto each other, so the true thermal output is usually slightly lower than the geometric calculation.
If you want to learn more about organizing cooling for an LED light source, we have a separate article and an online cooling heatsink calculator for LED lamps ↗.